

Introduction
Sending emails with Invoice Stack is an option you can enable that gives you lots of extra flexibility about how your invoices are sent to your clients or customers.
Instead of using your accounting platform, Invoice Stack will process and send emails direct. Your invoices will still be synced as normal to your accounting platform, along with the send status.
Using this feature unlocks great benefits like:
- Ability to edit email messaging and pick recipients (including CC/BCC) from inside HubSpot
- Professional email templates with your branding
- Sync delivery status (including opens and clicks) to HubSpot and your accounting platform
- A branded payment portal where you can connect one of 30+ payment providers
- Automated email sending when invoices are ready to go out
This feature is available using the Automated Send, or from inside HubSpot. If you don't want to use the new feature - our legacy send options are still available.
Send with Invoice Stack is included with all plans.
About the emails
Emails are sent via our partner Resend - who have a great reputation for data protection and deliverability. No customer email address data is stored in Invoice Stack - more info on security.
The email template is generated by Invoice Stack - and you can customise the following details. Click here to see a sample email.
- Logo
- Brand Colour
- Default invoice message
- Footer text
The other email details are as follows
| Subject line | INV-001 from Your Organisation | "Your Organisation" is the Company name you specified on sign up - contact us if you need to change this |
| From | Your Organisation <noreply@pay.invoicestack.co> | Note that this email address aligns to the links in the email for best practice deliverability |
| Reply-to | Customisable | Change this in your settings |
| Attachments | Invoice PDF | Uses template from your accounting platform |
| Call to action | View and Pay invoice | Goes to payment portal |
| Tracking | Delivery, Bounces, Opens, Clicks |
Getting started
To get set up - log in to your Invoice Stack dashboard. Then, pick Preferences > Send invoices from the menu.
The first option you will see at the top of the screen is "How would you like to send Invoices". To use the functionality described on this page, just choose "Invoice Stack".
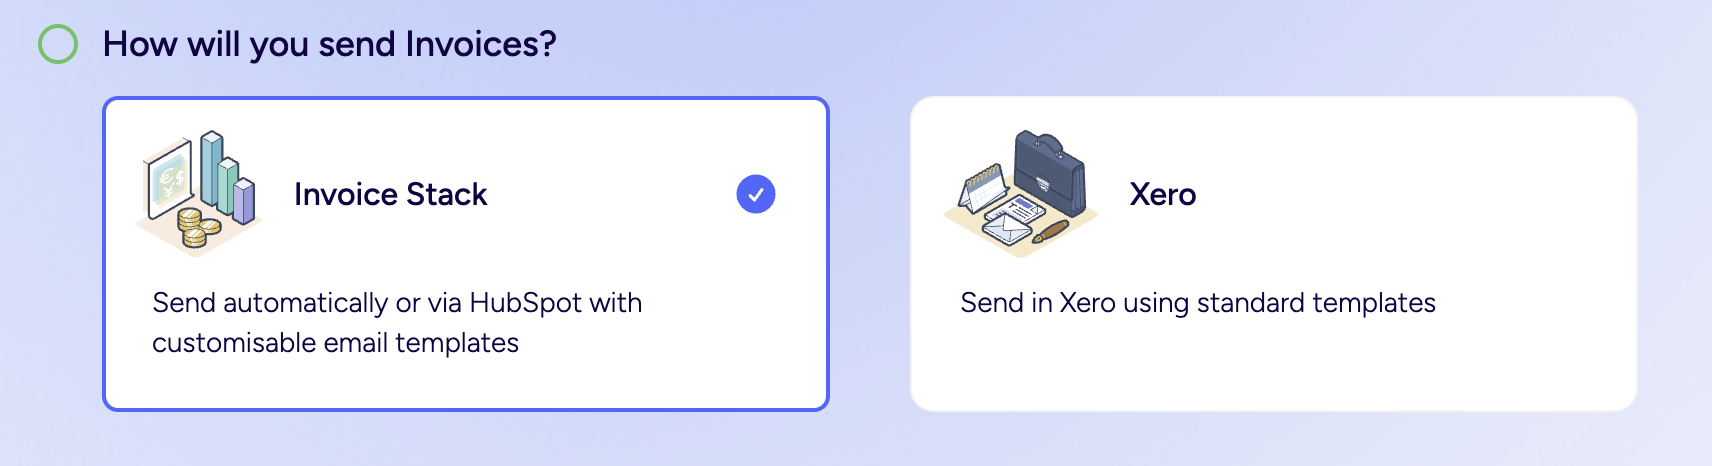
This will open up the rest of the settings where you will be able to customise and preview your email set up.
Once complete - you'll also see a prompt to configure your payment settings. If you want to accept online payments from the payment portal, follow these steps to link up your payment provider.
Send invoices from HubSpot
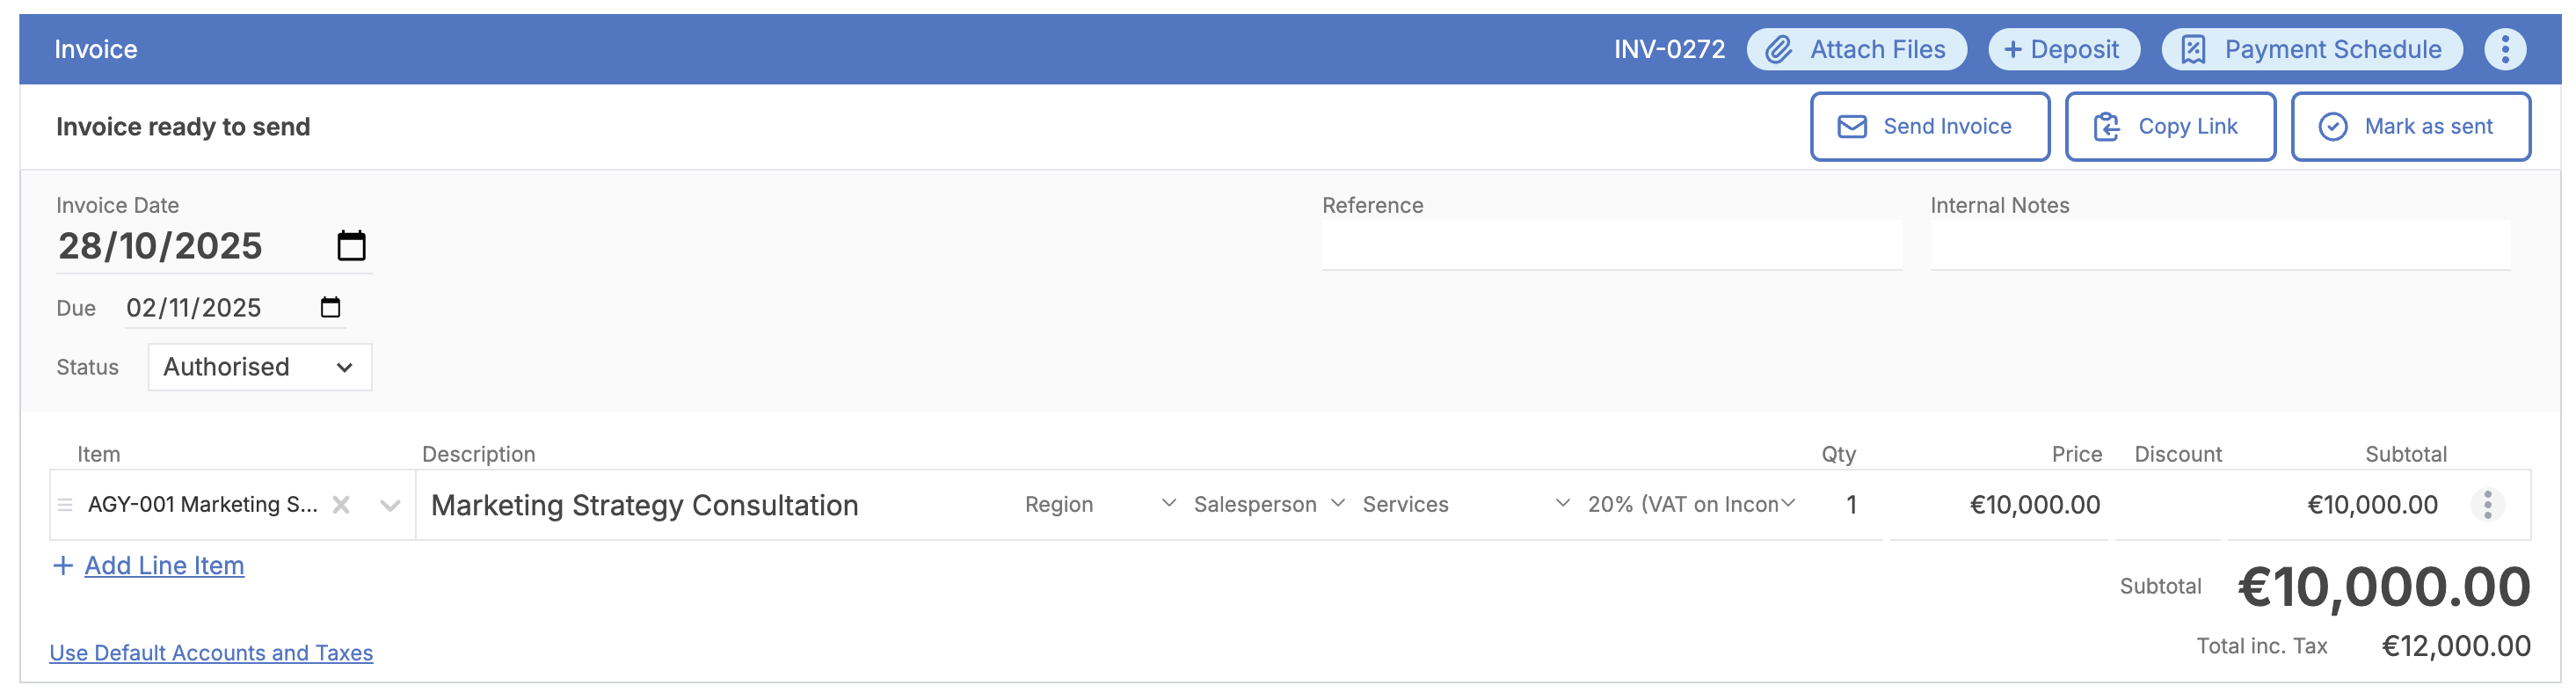
When you start up Invoice Stack and create an invoice - the first step once you've entered the data is to hit "Sync" to add the invoice to your accounting platform. If you're using Xero, you also need to make sure the invoice has the status set to "Authorised".
Once you've done this - you will see the "Send" bar show at the top of the invoice with a button named Send Invoice. (Note, if this reads "Send with Xero" or Send with QuickBooks - then you need to complete the Getting Started steps above)
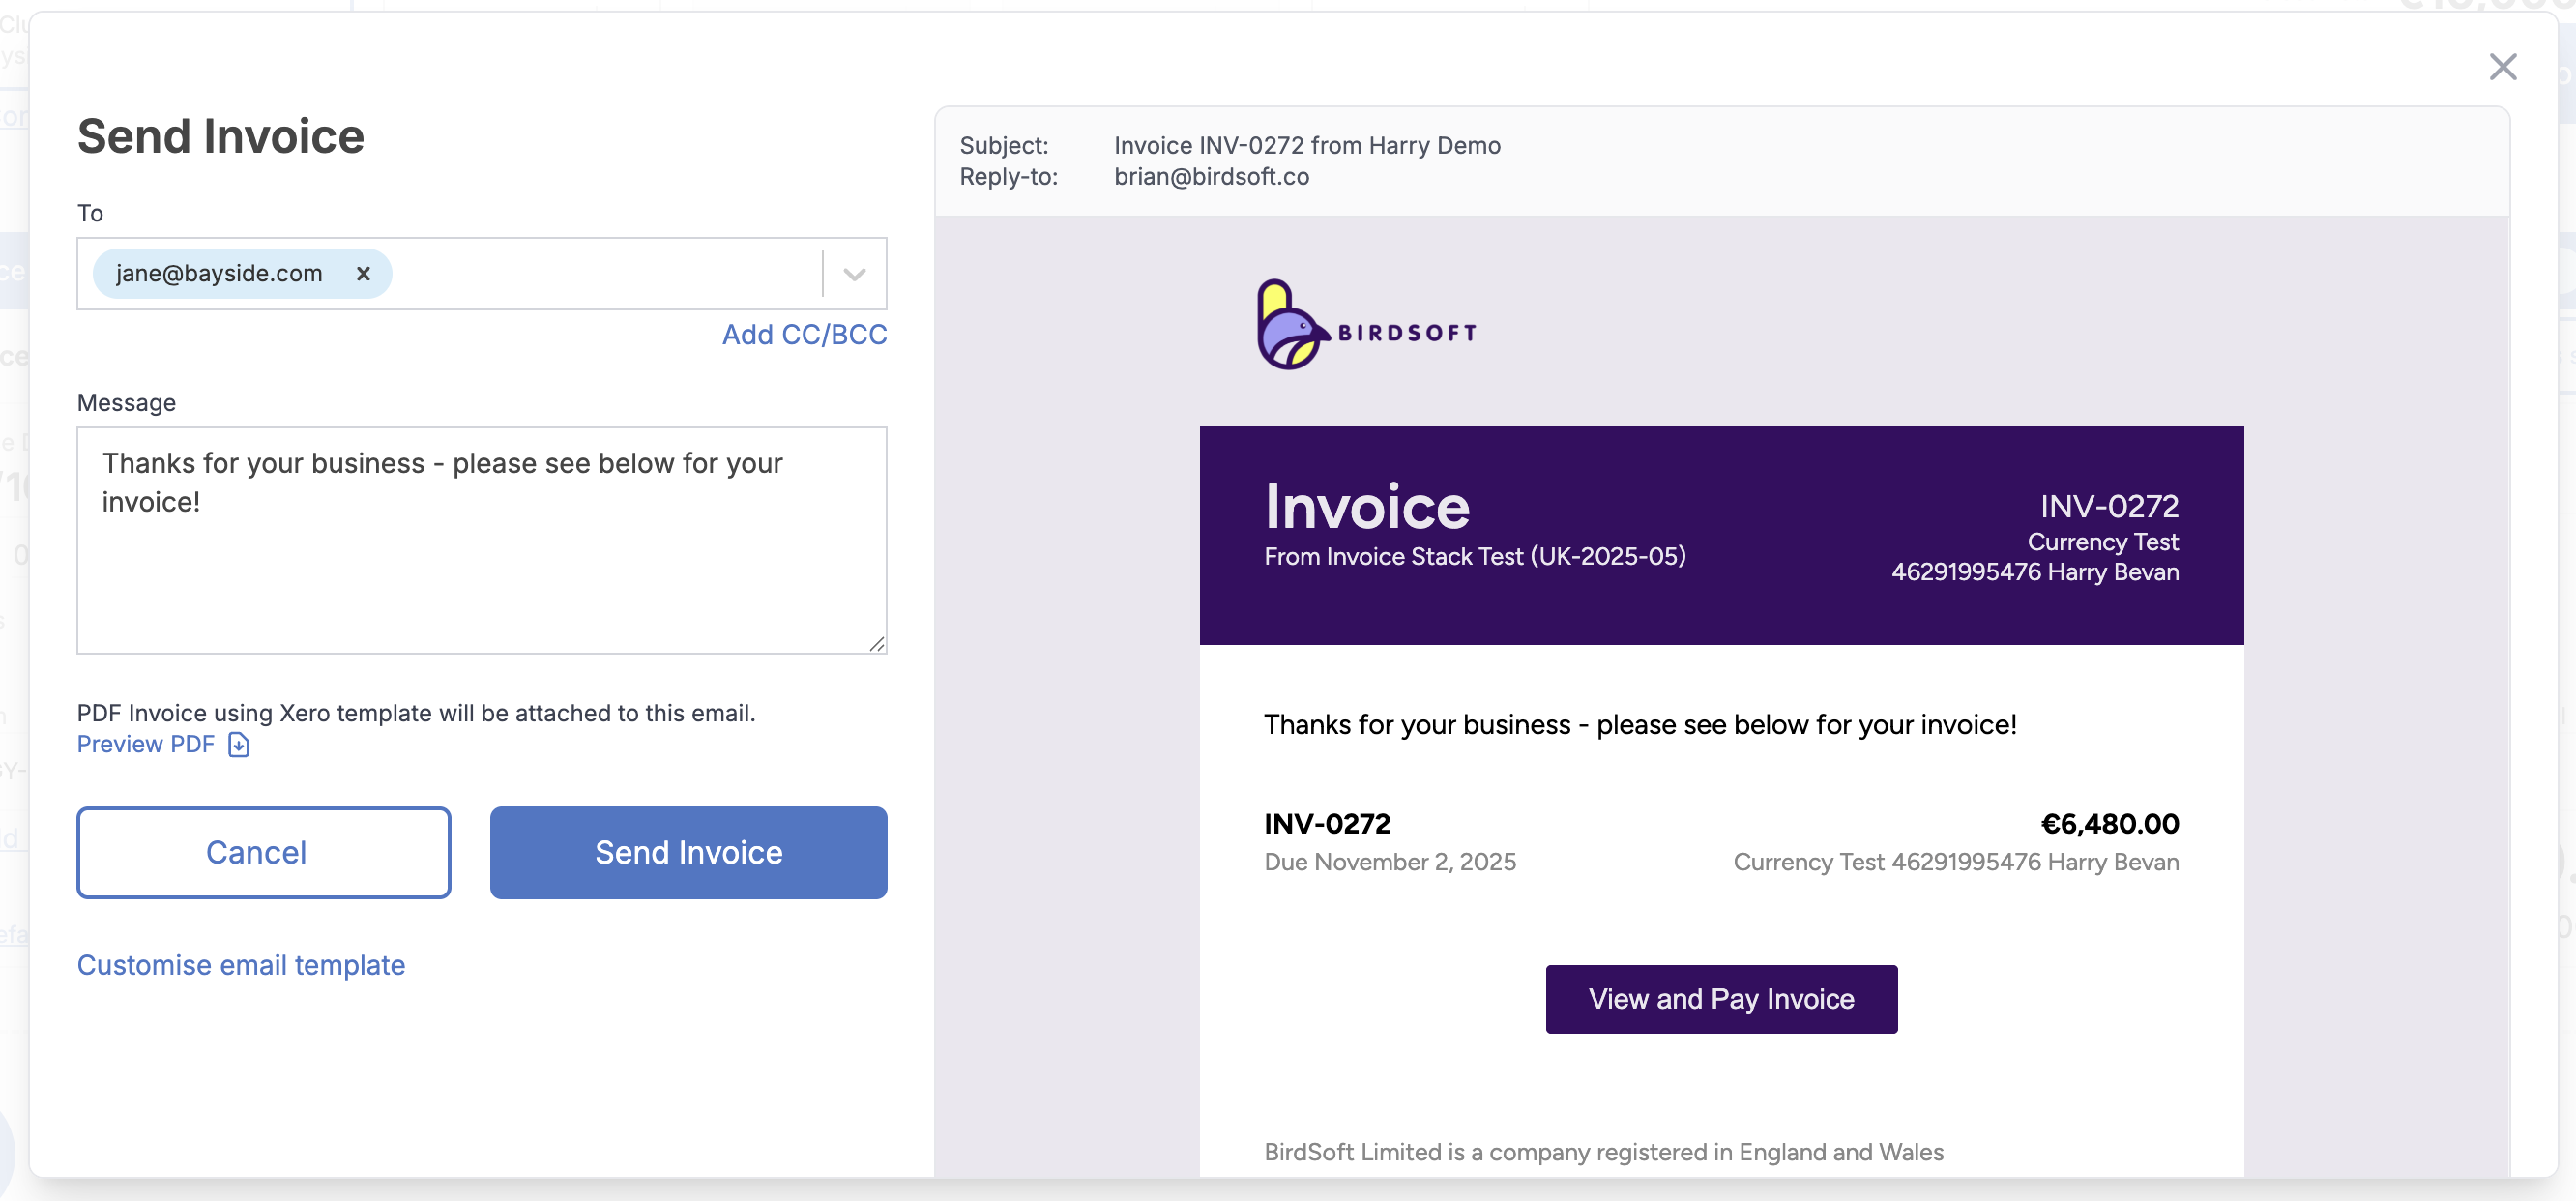
Once clicked, you'll see the Send window pop up. You'll be able to customise the recipients here, edit the message and preview the email before sending.
The recipients by default will list the contacts associated to the contact in your accounting platform, along with the contacts associated to your HubSpot deal. However you can delete any that are not required by clicking the "x" next to the email address. You can also configure CC/BCC contacts, add new email addresses, and drag and drop between fields.
You can come back to this screen and send again or send to different addresses, as many times as you need to.
Send automatically
Sending invoices automatically is a great option if:
- You're creating invoices automatically from workflows
- You have future invoices or staged payments that you want to go out automatically
- You're syncing invoices to Xero as Draft and you want someone to Approve the invoice before it's sent out
To set this up, just configure the options at the bottom of the sending invoices preferences page:
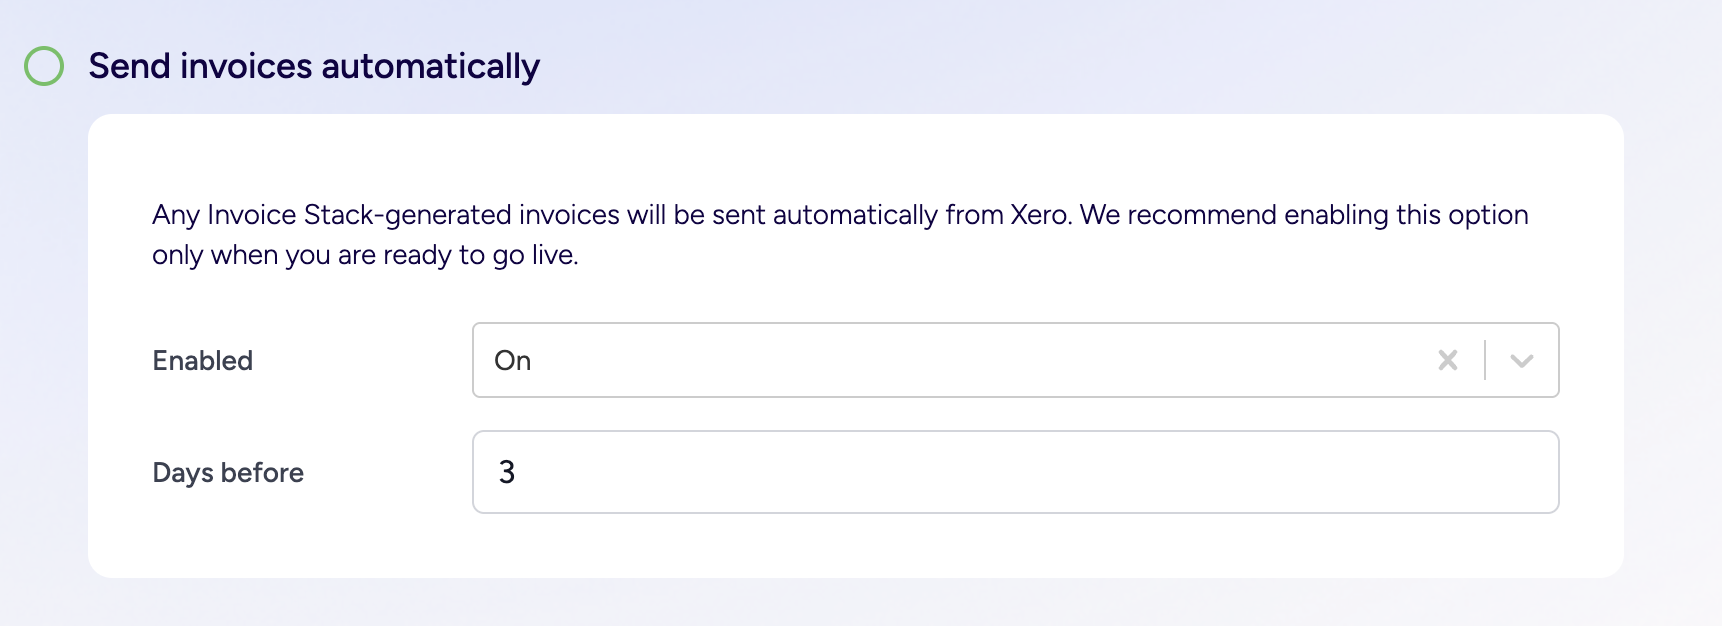
When activated - this will sync into your accounting platform and automatically email any invoices that meet the following criteria
- Were created from Invoice Stack
- Have the status "Authorised" (if using Xero)
- Have not already been marked as Sent (e.g. if sent manually via Invoice Stack or in your accounting platform)
- Today's date is the Invoice Date, or X days before the Invoice Date, depending on your settings
The email will send out using the template settings and default message, to all the email addresses on that contact in your accounting platform.
Invoices are checked against the criteria above on an hourly basis. Note - if an Invoice meets the rest of the criteria after it's supposed to go out, then it will not be sent.
Email status tracking
When an email is sent (either sent from HubSpot or if sent automatically) - you'll see updated information inside the activity feed for the deal.
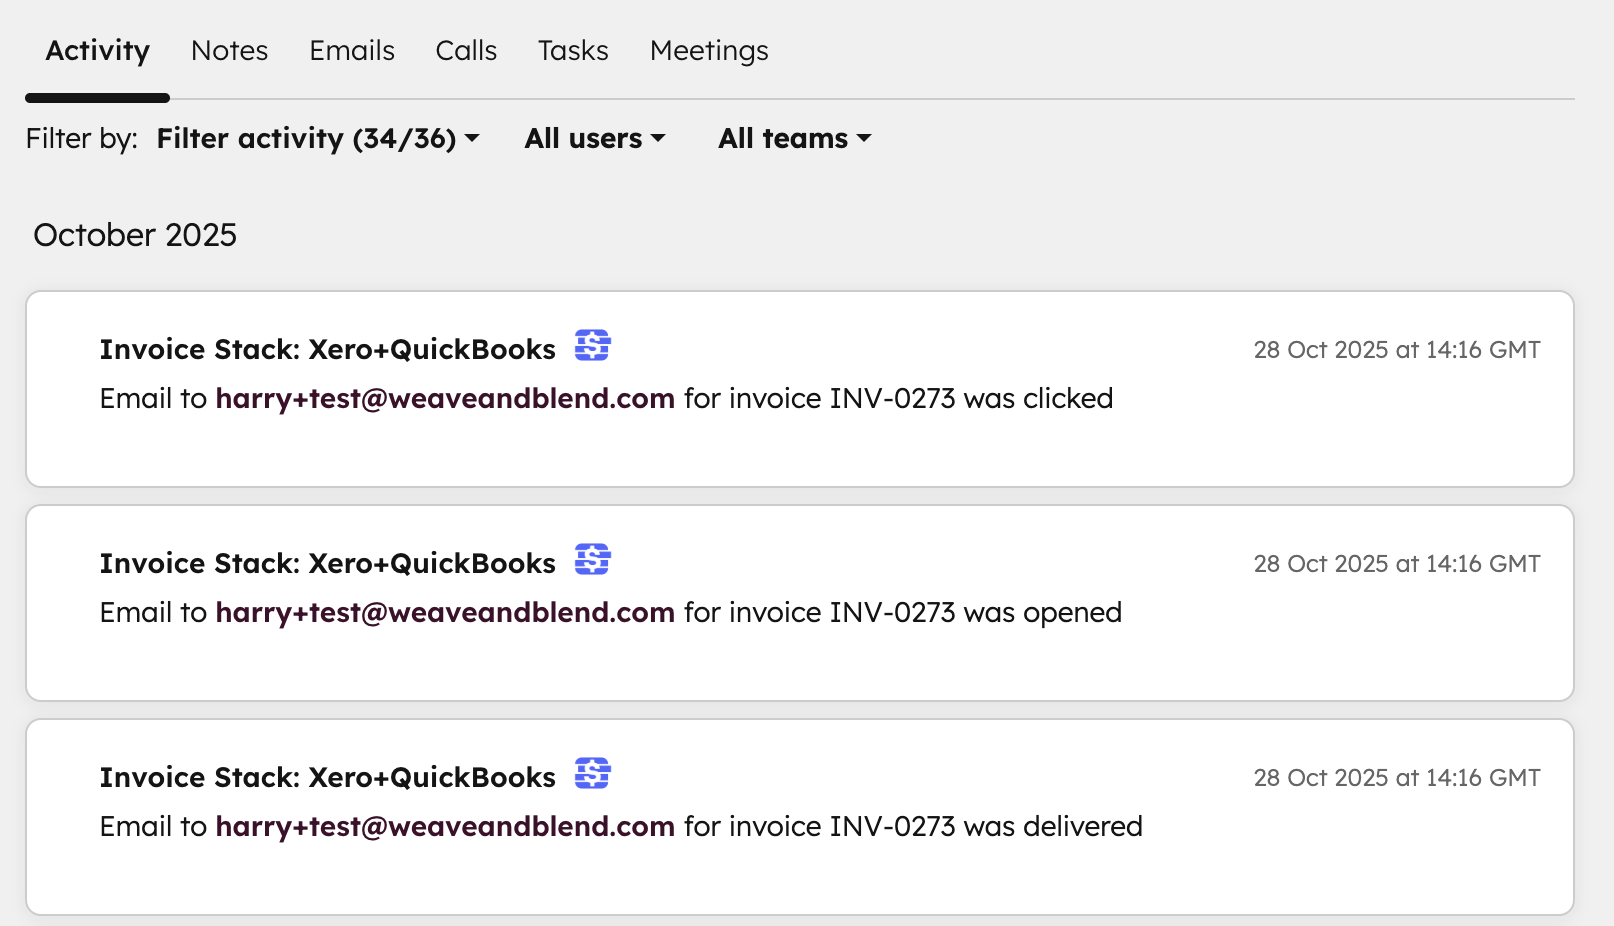
You will see the following updates here:
- Email Sent - this will log a full copy of the invoice as an Email activity on the HubSpot deal
- Invoice Email Delivered
- Invoice Email Bounced
- Invoice Email Opened
- Invoice Email Clicked
If these don't show up for you - make sure to check the "Filter activity" section at the top of the deal - you should see an option for Invoice Stack, make sure this is checked.
Your invoice will also be flagged as sent inside your accounting platform, so you can easily spot what's been sent or not. For Xero, we will also update the "History and Notes" section at the bottom of the invoice with the above statuses.
Finally there are also two relevant deal properties that will be updated:
- Invoices Sent (True/False)
- Last email bounced (True/False)
You can use these properties in HubSpot workflows, for example to make a notification to the deal owner if an email send has bounced.
Payment portal
Every email will include a link to a branded payment portal. This is a unique link that your customer can use to view the invoice details, due dates, download a PDF copy, and make a payment.

The payment portal will list all the invoices on a deal - with future invoices listed separately. The payment portal will be branded with the same colours and logo that you chose for the email template.
On the right hand side of the payment portal you can list payment instructions - and also enable online payments. You can connect up one of up to 30 payment providers here, including Stripe, GoCardless, Paypal and many more. Online payments are optional.
This means your customers can pay for invoices instantly. The payment portal even supports payments for multiple invoices all at once.