
Invoice Stack has lots of different tools in order to make splitting invoices easy - this guide will cover each method and when the best time to use it is. Just a quick note - if you have repeating elements e.g. monthly or annual billing - you may be better off looking at repeating invoices instead.
Method 1 - Splitting invoices manually
We're starting with this method because it's the simplest to understand, but it does require a little manual input.
When Invoice Stack starts up it will "Autofill" an invoice - e.g. grab the line items from your deal, and populate a single invoice with today's date. Most of the other settings should be filled out automatically for you.
Once the Autofill has run - you are then free to edit the invoice as much as you like, including copying or creating extra invoices.
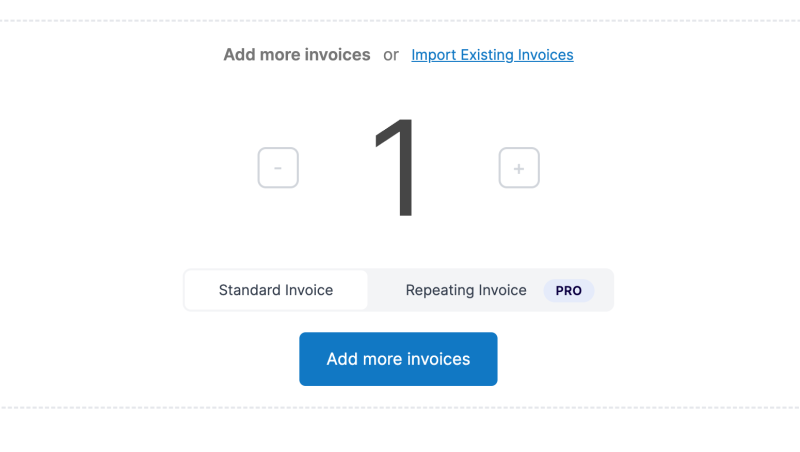
If you are billing different line items in different invoices - just choose how many extra invoices you'd like to create by scrolling down or using the "plus" icon in the corner of the screen.
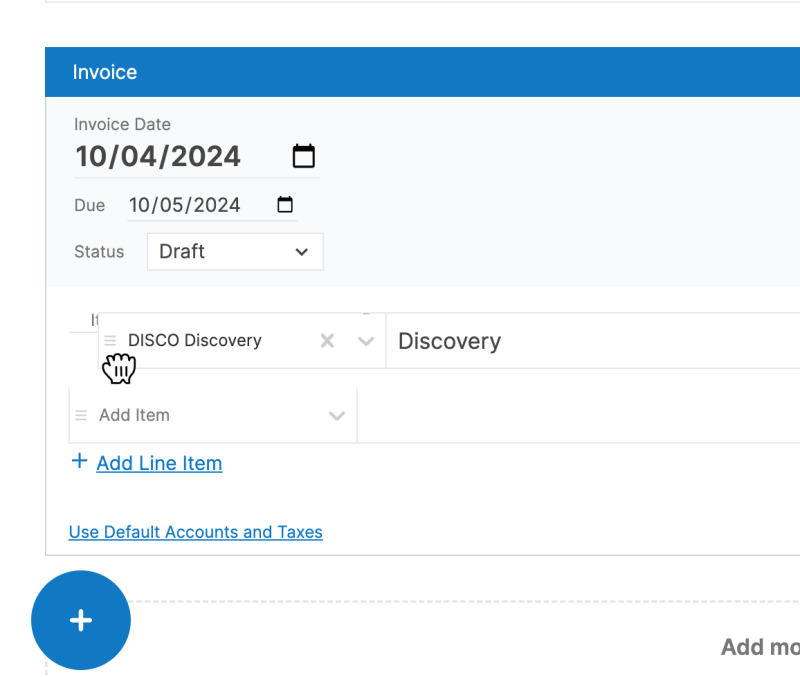
Then, use the drag and drop handle on the left of the line items, to drag line items from the first invoice, to the new invoice(s) you've just created. Then just add your dates and you're ready to go.
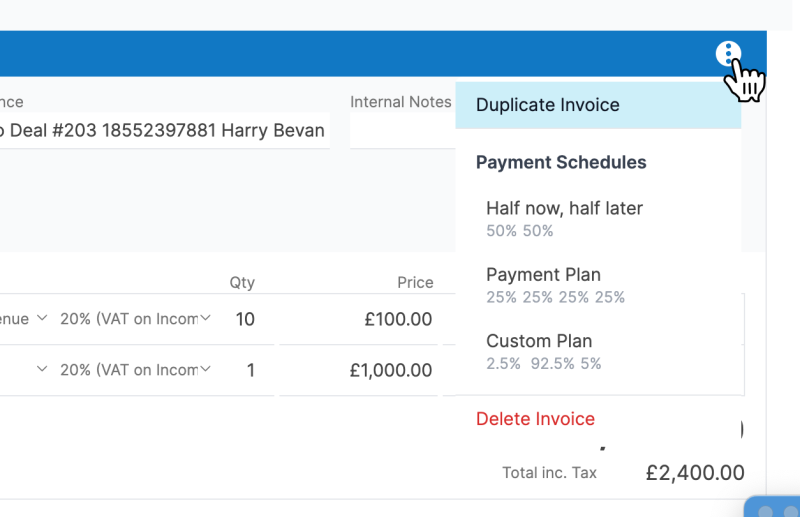
If you're billing the same line items each time (or just have a single item) - then instead of creating new invoices, open up your invoice menu, and choose "Duplicate Invoice" - this will copy all the line items onto a new invoice - then just adjust the quantities and dates on each invoice.
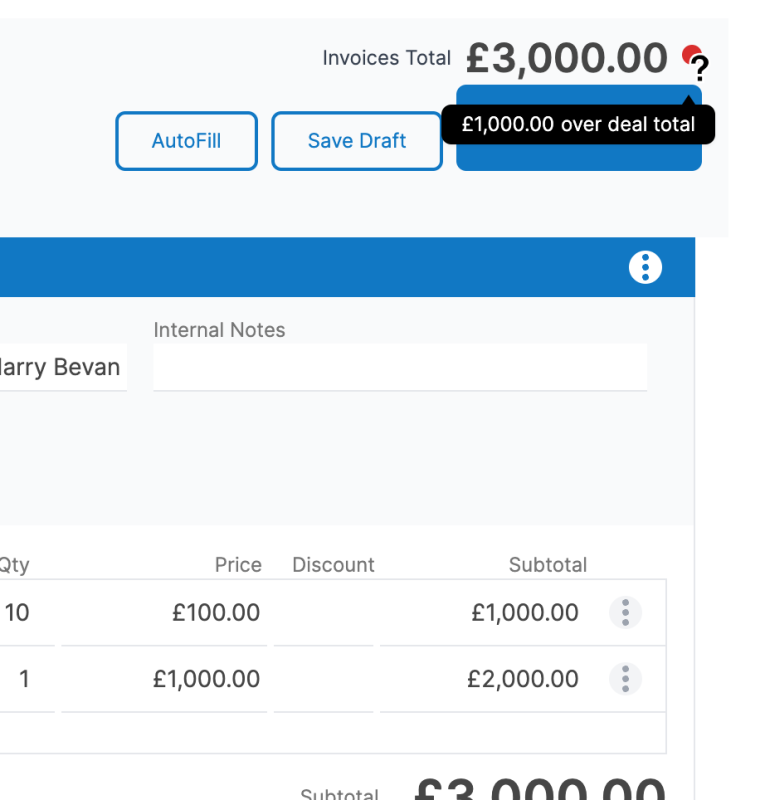
For both ways you can keep an eye on the indicator at the top of the screen - this will show you when your deal total matches your invoice total and is a good way to make sure you haven't missed anything! It will show green if your invoices add up to the same amount as the total on your deal, and red if not. Hover over for more information. This won't stop you from being able to create invoices but it's a handy check.
Splitting invoices manually is a good choice if:
- You don't store the data about billing periods anywhere else
- Each deal is different
Method 2 - Using billing start date in HubSpot line items
This is the perfect choice if you're using HubSpot quotes to present data to your customer, and if you are billing different line items on different dates.
When you build your quote in HubSpot you'll see an option for "Billing Start Date" - this can be populated with a "Custom Date":
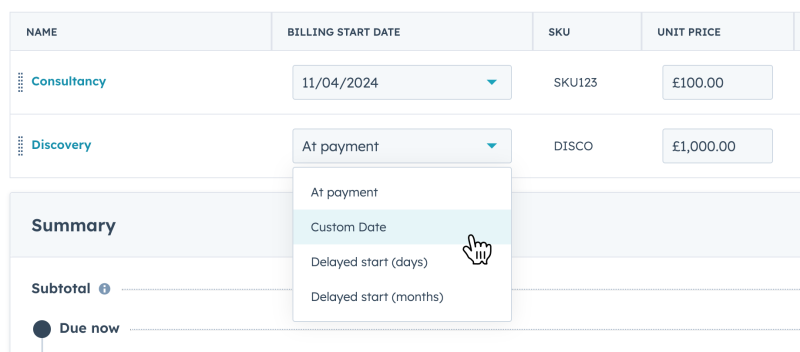
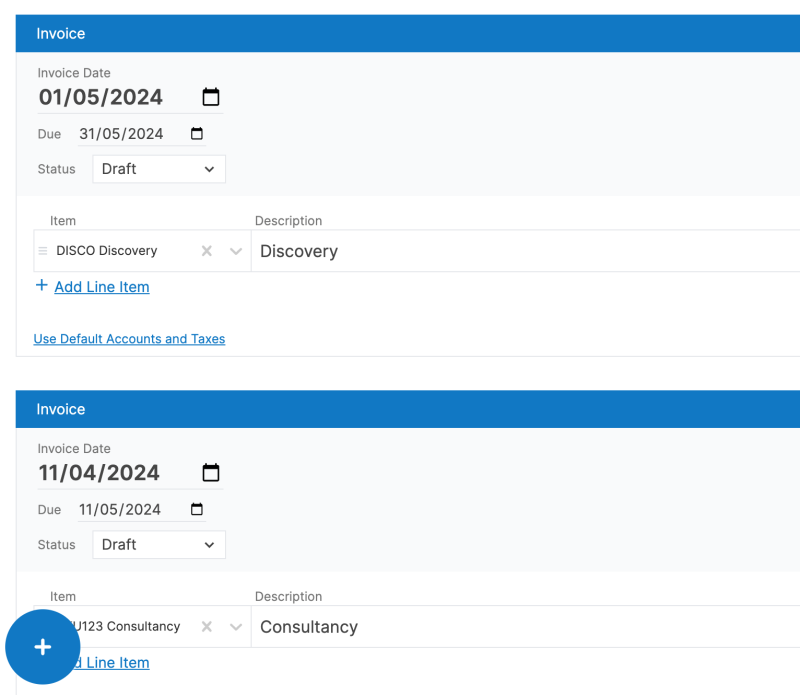
If this property is populated, when Invoice Stack starts up it will automatically create a separate invoice for each Billing Start Date, and group the line items all together. Once that's done - all it requires is a check over, and you're done!
Tip - if you need a way to calculate Billing Start Date and other line item properties automatically - check out our other app LinePilot.
Method 3 - Payment Schedules
Note: Only available to Invoice Stack Pro and Enterprise customers
If you are billing the same line items in each invoice, split into multiple payments then Payment Schedules is the perfect tool for you to use. It allows you to define standard Payment Schedules for your organisation (e.g. 30% upfront, 70% balance) - and allow Invoice Stack to calculate the invoices for you.
First an admin will need to configure Payment Schedules inside your Invoice Stack dashboard. Go to "Preferences" and scroll to the bottom of the page. You can define one or more Schedules, and specify the percentage splits for each one.
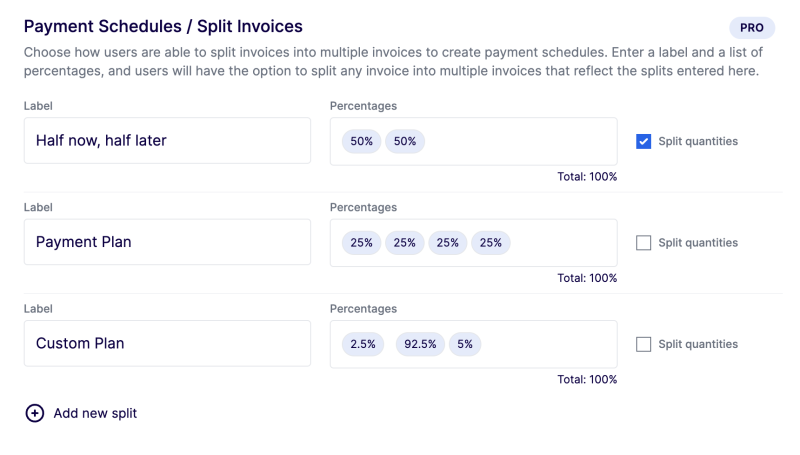
You can also choose to "Split quantities" - if selected this will not only adjust the price but also the quantity of the products, this is helpful if you're using inventory billing or adding up the quantity sold for each item in your accounting platform.
Once set up, all your users will see the option inside Invoice Stack.
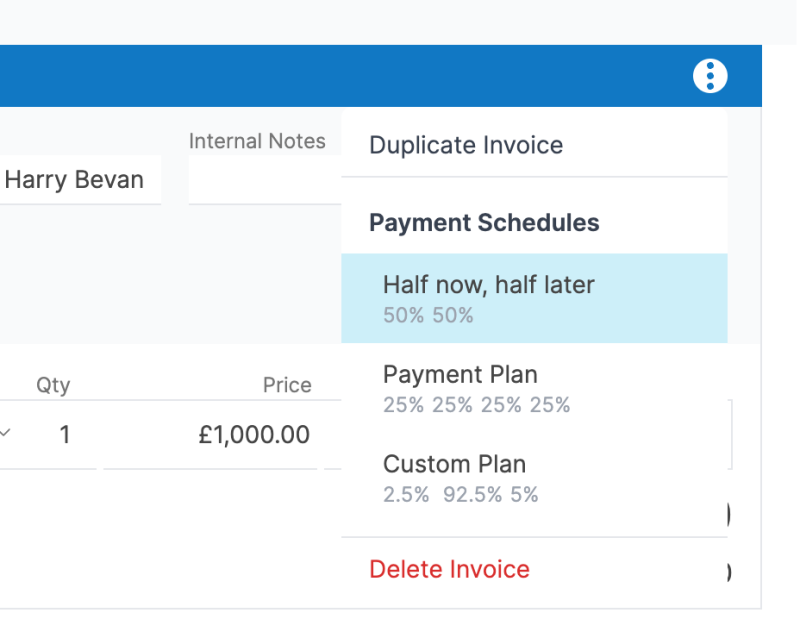
When Invoice Stack starts, the initial invoice will be filled out as a single invoice, then just click the Invoice menu and choose the Payment Schedule you'd like to apply. Invoice Stack will calculate everything, all you need to do is add the dates.
We recommend for this method that you make sure your values can be cleanly divided by the percentages you choose, otherwise you will end up with $3.333333 which may not be supported by your accounting platform.
Conclusion
We hope you've understood all the different ways you can split invoices using Invoice Stack - if you need advice on what's best for you or you need any assistance getting set up - reach out to our support team.